Posts: 64
Threads: 3
Joined: Oct 2015
Reputation:
1
Location: Netherlands
Car Model/Spec: 306 Estate GTi6
Posts: 1,778
Threads: 213
Joined: Jul 2013
Reputation:
2
Location: The North
Car Model/Spec: HDI
Really looking forward to more updates with this!
Did you find new fog lights or clean the old ones up? One of mine is similar to yours at the moment
Posts: 64
Threads: 3
Joined: Oct 2015
Reputation:
1
Location: Netherlands
Car Model/Spec: 306 Estate GTi6
30-10-2015, 10:25 AM
(This post was last modified: 30-10-2015, 10:27 AM by ronj.)
Electric stuff.
I am an embedded software engineer by trade, with an interest in electronics so did some modifications on that front as well.
First I modified the original radio-stalk to directly control the Pioneer HU without a stupid interface.
![[Image: Foto-QVSRRNXO-D.jpg]](http://www.mijnalbum.nl/Foto-QVSRRNXO-D.jpg)
![[Image: Foto-TJGV6T8N-D.jpg]](http://www.mijnalbum.nl/Foto-TJGV6T8N-D.jpg)
Next I added a 1.8" TFT screen filling the void in the dash where normally the indicator for the automatic box would be controlled by a microcontroller. It displays things like: speed, rpm, current gear, distance and time driven (three trip computers), instant and total fuel consumption, distance to tank empty, parking sensor info, sequential shift-light. The feature set is still in flux, I add things when I have some spare time.
![[Image: Foto-CG8GFERU-D.jpg]](http://www.mijnalbum.nl/Foto-CG8GFERU-D.jpg)
![[Image: Foto-ZT88KK6J-D.jpg]](http://www.mijnalbum.nl/Foto-ZT88KK6J-D.jpg)
![[Image: Foto-6PZFTVMM-D.jpg]](http://www.mijnalbum.nl/Foto-6PZFTVMM-D.jpg)
Added a C5 auto-dimming mirror.
![[Image: Foto-DVVYPRSK-D.jpg]](http://www.mijnalbum.nl/Foto-DVVYPRSK-D.jpg)
Refurbished the rear wiper motor and added a VW '99' relais as to control the interval.
![[Image: Foto-TLXPDXG6-D.jpg]](http://www.mijnalbum.nl/Foto-TLXPDXG6-D.jpg)
![[Image: Foto-P4E7QCF7-D.jpg]](http://www.mijnalbum.nl/Foto-P4E7QCF7-D.jpg) Preparation for GTi6 transplant.
Preparation for GTi6 transplant.
First off I wanted to fix the front suspension. Adding Bilstein's with Eibach springs. Refurbing the wishbones.
![[Image: Foto-GXQ8WC4M-D.jpg]](http://www.mijnalbum.nl/Foto-GXQ8WC4M-D.jpg)
![[Image: Foto-G8YDRCWB-D.jpg]](http://www.mijnalbum.nl/Foto-G8YDRCWB-D.jpg)
![[Image: Foto-WTWNHH74-D.jpg]](http://www.mijnalbum.nl/Foto-WTWNHH74-D.jpg)
![[Image: Foto-VKDJHPFE-D.jpg]](http://www.mijnalbum.nl/Foto-VKDJHPFE-D.jpg) Getting there.
Getting there.
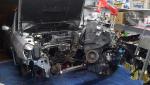
Now it was time to rebuild the 6 engine and start fitting that.
Last look at the old lump:
![[Image: Foto-FPMRP8W7-D.jpg]](http://www.mijnalbum.nl/Foto-FPMRP8W7-D.jpg)
![[Image: Foto-ISMQWP4Q-D.jpg]](http://www.mijnalbum.nl/Foto-ISMQWP4Q-D.jpg)
![[Image: Foto-ILDWVGGR-D.jpg]](http://www.mijnalbum.nl/Foto-ILDWVGGR-D.jpg)
![[Image: Foto-OEC3EKK6-D.jpg]](http://www.mijnalbum.nl/Foto-OEC3EKK6-D.jpg)
![[Image: Foto-FQZJFBOH-D.jpg]](http://www.mijnalbum.nl/Foto-FQZJFBOH-D.jpg)
![[Image: Foto-3CHEM7ER-D.jpg]](http://www.mijnalbum.nl/Foto-3CHEM7ER-D.jpg)
![[Image: Foto-DSXFJLTO-D.jpg]](http://www.mijnalbum.nl/Foto-DSXFJLTO-D.jpg)
And that's the current status for now. More will follow as we progress.
@MY95: I bought new fog's and new headlights. It was beyond saving. The previous owner had ripped out the plug, which in turn broke the seal letting water leak inside.
Posts: 19,854
Threads: 581
Joined: Dec 2011
Reputation:
195
Location: Bournemouth
Car Model/Spec: Supercharged 306 GTi6


This is awesome!
Were the seats direct fit? And did the screen in the dials come as a kit or did you build that from scratch?
Team Eaton
1999 China Blue 306 GTi6 - Eaton Supercharged - 214.5bhp 181lbft
Posts: 13,881
Threads: 476
Joined: Dec 2011
Reputation:
81
Location: Ipswich
Car Model/Spec: 306 Rallye
My god this is epic. Can you do a guide and share the code and parts needed for the trip computer. I thought of doing this at uni when i was doing an embedded systems module but never got round to it. Great to see you have done it. Im sure people would like to see a guide on how to connect the stalk directly to their head unit too. Great work!
Does the HDD require power? or does it run straight on the radio USB?
Posts: 6,258
Threads: 371
Joined: Feb 2014
Reputation:
29
Location: suffolk
Car Model/Spec: ford fiesta
Im really loving this as well. Not the gti6 engine as much but the electrical side of things. My god. HERO!
On a break from 306oc for personal reasons. If anyone needs or wants me most of you have my number and or facebook messenger
Thanks for the good times guys n gals. I might be back. Who knows.
Posts: 64
Threads: 3
Joined: Oct 2015
Reputation:
1
Location: Netherlands
Car Model/Spec: 306 Estate GTi6
Thanks guys, really appreciate my work getting some credit  .
@Niall: mechanically the seats are a direct fit. But I still have to move up the motors on the bottom since driver side is fouling the crossmember a bit. Which makes front to rear adjustment a bitch. The screen in the dials I built from scratch.
@Eeyore: I can do a guide about the trip computer, the code can be found on my GitHub account teensy-dash. Also I can translate the guide I did for the stalk from the Dutch forum. The HDD is powered from the radio USB directly it can provide 1 amp of juice.
@bashbarnard: diesels are way to expensive in the Netherlands for the miles I drive. So to have some go I thought the GTi6 engine would be a good alternative.
Maybe a bit more info about the dash.
Of course it is centered around the 1.8" display in the 306 dash. That display is driven by a Teensy 3.1 microcontroller, an ARM based beast with lot's of IO and memory. It couples directly to the RPM and wheel speed signals in the dash. So for RPM/Speed/Shift-light/Gear/Trip computer no external mods to the car, besides the dash, are necessary. For fuel it taps into an injector ground. The rear parking sensors I reverse engineered the protocol and also requires two wires running to the Teensy.
Plans for the future are:
- Oil temp/Oil pressure
- Tire pressure and temperature support
- High/low alarms
Here is a picture of the parts used (most of it at least). And adding it in the dash.
![[Image: Foto-6LVQS68M-D.jpg]](http://www.mijnalbum.nl/Foto-6LVQS68M-D.jpg)
![[Image: Foto-KCRJQBHJ-D.jpg]](http://www.mijnalbum.nl/Foto-KCRJQBHJ-D.jpg)
![[Image: Foto-IUP4UBOR-D.jpg]](http://www.mijnalbum.nl/Foto-IUP4UBOR-D.jpg)
![[Image: Foto-HRWFRYI7-D.jpg]](http://www.mijnalbum.nl/Foto-HRWFRYI7-D.jpg)
![[Image: Foto-WOQAHW4O-D.jpg]](http://www.mijnalbum.nl/Foto-WOQAHW4O-D.jpg)
![[Image: Foto-TINX37TY-D.jpg]](http://www.mijnalbum.nl/Foto-TINX37TY-D.jpg)
Some YouTube vids:
https://www.youtube.com/watch?v=vCdsyODlac4
https://www.youtube.com/watch?v=e_CTIFB6VvA
https://www.youtube.com/watch?v=a6kN2D5Val8
Posts: 13,881
Threads: 476
Joined: Dec 2011
Reputation:
81
Location: Ipswich
Car Model/Spec: 306 Rallye
Posts: 6,367
Threads: 87
Joined: Dec 2011
Reputation:
48
Location: South Yorks.
Car Model/Spec: Rouge vallelunga 5 door Dturbo

This is a great looking project with some real trick bits in it, loving it all, seats look sweet too 
Phase 1 D-Turdo, K14@24 psi, De-cat, meaty backbox, Bosch pump, grinded LDA pin, duel air fed K&N =133.7bhp & 188ft/lbs
Posts: 2,636
Threads: 102
Joined: Oct 2013
Reputation:
18
Location: Warwickshire
Car Model/Spec: Ph.1 Gti-6 63k
Really interesting project. Will be looking at this closely.
This post is an artistic work of fiction and falsehood. Only a fool would take anything posted above as fact.
62k Diablo Phase 1 Gti-6: Project Thread
Posts: 79
Threads: 3
Joined: May 2013
I love the seats!!! Excellent work. I'll keep an eye on this.
Posts: 22
Threads: 0
Joined: Oct 2015
Reputation:
0
Location: South Wales
Car Model/Spec: 2000 306 gti-6
Looks like it's going to be an interesting build. I have to say that display you made is wonderful, I really miss the trip computer in mine.
Posts: 64
Threads: 3
Joined: Oct 2015
Reputation:
1
Location: Netherlands
Car Model/Spec: 306 Estate GTi6
If anyone wants to build their own, the schematics at the GitHub page are a bit out of date. There is no clear description on the signal conditioning of RPM and wheel speed. I'll try my best to update that part soon. I am always available for questions and guidance, also very open to feature requests.
In the meantime I am busy with the headlights. I want to retrofit xenon projectors. While having the headlight open I noticed that my NeoPixel ring fitted perfectly behind the indicator lens.
https://www.youtube.com/watch?v=Zsj-lm2noh0
Also de-rusted and painted the original air-box.
![[Image: Foto-6GOGKPAB-D.jpg]](http://www.mijnalbum.nl/Foto-6GOGKPAB-D.jpg)
Posts: 53
Threads: 16
Joined: Oct 2014
Location: Leatherhead
Car Model/Spec: '99 Cherry Rallye
Posts: 14,208
Threads: 448
Joined: Dec 2011
Reputation:
51
Location: isle of wight
Car Model/Spec: Pov. Spec White '6
This is looking to be an incredable project! I love the computer! And those seats look dead comfy. The attention to detail is insane, even that airbox looks good!
![[Image: 20A1806D-891D-40FB-BD52-AD519177A607-734...391753.jpg]](http://i35.photobucket.com/albums/d196/mattbush/20A1806D-891D-40FB-BD52-AD519177A607-7340-0000058F46391753.jpg) TEAM CONROD SHITTING RALLYE!
TEAM CONROD SHITTING RALLYE!
Posts: 1,106
Threads: 67
Joined: Apr 2014
Reputation:
5
Location: Dereham
Car Model/Spec: 306 Sedan - Ph1 Dturbo
Usually dis-like the gti-6 estate projects but im feeling converted by this! Bloody awesome build [THUMBS UP SIGN]
Justin_306DTurbo
306 Ph1 Dturbo Sedan
306 Ph1 Dturbo Estate (VNT)
Partner Ph1 (XUD Swap)
306 HDI Stage 3 Estate (RIP)
Posts: 64
Threads: 3
Joined: Oct 2015
Reputation:
1
Location: Netherlands
Car Model/Spec: 306 Estate GTi6
Made some progress again.
Got the subframe on. Installed new driveshafts and seals.
![[Image: Foto-M4LFDKUF-D.jpg]](http://www.mijnalbum.nl/Foto-M4LFDKUF-D.jpg)
Completely new exhaust front to rear.
![[Image: Foto-GHVAQRK7-D.jpg]](http://www.mijnalbum.nl/Foto-GHVAQRK7-D.jpg)
![[Image: Foto-TJQJ3B3V-D.jpg]](http://www.mijnalbum.nl/Foto-TJQJ3B3V-D.jpg)
Reverse lock-out cable installed for the 6-speed.
![[Image: Foto-83TGJBMR-D.jpg]](http://www.mijnalbum.nl/Foto-83TGJBMR-D.jpg)
Too bad my knob is broken , so I need a new one.
![[Image: Foto-7DSJRVP6-D.jpg]](http://www.mijnalbum.nl/Foto-7DSJRVP6-D.jpg)
We're getting there. Next saturday going to rob some missing parts of a to be wrecked GTi. So not much progress up 'till then.
Posts: 18,242
Threads: 386
Joined: Dec 2011
Reputation:
87
Location: Suffolk
Car Model/Spec: Focus Titanium
Project threads generally bore me lol, but this is awesome! Dare I ask how much it's cost so far? Would've cost a fair bit over here so just wondering how it compares.
Posts: 20,092
Threads: 591
Joined: Nov 2012
Reputation:
54
Location: Cotswolds
Car Model/Spec: Stage 13 16v HDi

Posts: 204
Threads: 26
Joined: Aug 2012
Reputation:
0
Location: Exeter
Car Model/Spec: 205 Mi16 and 306 HDI
The headlights and dash are awesome mate
Posts: 64
Threads: 3
Joined: Oct 2015
Reputation:
1
Location: Netherlands
Car Model/Spec: 306 Estate GTi6
I think total cost is going to be between 6000 and 8000 euro when done. But then I could reset the mileage to 0 because almost everything is new of refurbed. That includes everything including engine, rear-axle, trip-computer... etc. Everything you see here basically.
This was made possible by the generous buy-off for my lease-car of my new employee . Otherwise I would have thought twice of doing this.
Posts: 18,242
Threads: 386
Joined: Dec 2011
Reputation:
87
Location: Suffolk
Car Model/Spec: Focus Titanium
I see, not cheap then, but as you say will be basically a new car time you're done!
Posts: 64
Threads: 3
Joined: Oct 2015
Reputation:
1
Location: Netherlands
Car Model/Spec: 306 Estate GTi6
Yeah indeed, not cheap but worth it I hope . My 205 is a bigger money burner.
Posts: 750
Threads: 30
Joined: Mar 2015
Reputation:
5
Location: Birmingham
Car Model/Spec: 306 HDi Dturbo 5dr
01-11-2015, 09:11 AM
(This post was last modified: 02-11-2015, 05:49 AM by highwayman306.)
Im in love   , very awesome build ronj i wanna see more 
p.s nice pyjamas
![[Image: 9fa12c59-0c3d-4413-968d-6a7840ff068f.jpg]](http://i693.photobucket.com/albums/vv295/highwayman306/9fa12c59-0c3d-4413-968d-6a7840ff068f.jpg)
Stage 1 HDi DTurbo Diablo 5dr, "Dee-Dee"
Posts: 1,213
Threads: 92
Joined: Dec 2011
Reputation:
5
Location: Birmingham
Car Model/Spec: Subaru 20.d, GTi 6, 205 xs
205 pics
Vehicle repair and servicing in the midlands pm for details
Current cars
Subaru Impreza 2.0d - Daily
306 1.8 - track whore soon to be GTI6
Posts: 64
Threads: 3
Joined: Oct 2015
Reputation:
1
Location: Netherlands
Car Model/Spec: 306 Estate GTi6
Haha thanks guys! Will do some more pyjama shoots for you lol .
The 205 project can be found here. Multi-year project no end in sight yet: http://forum.205gtidrivers.com/index.php...pic=159853. Sub 800 kg above 300 hp is the end-goal.
Posts: 750
Threads: 30
Joined: Mar 2015
Reputation:
5
Location: Birmingham
Car Model/Spec: 306 HDi Dturbo 5dr
Lol more stripes and fur please ha-ha
Il have a read of ur 205 project later, tapacrap does my head in, sounds interesting though being light and powerful
Stage 1 HDi DTurbo Diablo 5dr, "Dee-Dee"
Posts: 7,825
Threads: 465
Joined: Dec 2011
Reputation:
114
Location: Cullompton Devon
Car Model/Spec: Vauxhall
nice use of the Teensy
would be interested in a guide and code for the gear indicator and shift light?
the guide would have to be a fairly comprehensive as i dont do code but can solder well
Posts: 55
Threads: 4
Joined: Jan 2015
Reputation:
0
Location: Worcester
Car Model/Spec: 306 Gti6
Wow this is some very skilled and impressive work!
Posts: 64
Threads: 3
Joined: Oct 2015
Reputation:
1
Location: Netherlands
Car Model/Spec: 306 Estate GTi6
Let me think a bit about how I want to approach getting people to build their own teensy-dash kits. I'll get back to you on that Cully. By the way your electronic projects are a great inspiration to me!
While waiting for some parts to arrive had to pick up the boring job of refurbing the brakes. Especially getting them to look half-decent was a job that required some elbow grease. Next time I'll send them off to get blasted.
![[Image: Foto-44IZSOJU-D.jpg]](http://www.mijnalbum.nl/Foto-44IZSOJU-D.jpg)
![[Image: Foto-MQLI4AT6-D.jpg]](http://www.mijnalbum.nl/Foto-MQLI4AT6-D.jpg)
![[Image: Foto-ZYIFRELN-D.jpg]](http://www.mijnalbum.nl/Foto-ZYIFRELN-D.jpg)
Slider pins were still in good nick so will reuse them, rubber seal kit is on its way.
|





![[Image: Foto-LYEDG8XJ-D.jpg]](http://www.mijnalbum.nl/Foto-LYEDG8XJ-D.jpg)
![[Image: Foto-PHV4ZTIH-D.jpg]](http://www.mijnalbum.nl/Foto-PHV4ZTIH-D.jpg)
![[Image: Foto-WGXL7ZDA-D.jpg]](http://www.mijnalbum.nl/Foto-WGXL7ZDA-D.jpg)
![[Image: Foto-VP6TG4KZ-D.jpg]](http://www.mijnalbum.nl/Foto-VP6TG4KZ-D.jpg)
![[Image: Foto-GAH6F6PC-D.jpg]](http://www.mijnalbum.nl/Foto-GAH6F6PC-D.jpg)
![[Image: Foto-C4SHOCWF-D.jpg]](http://www.mijnalbum.nl/Foto-C4SHOCWF-D.jpg)
![[Image: Foto-AOIFKAUY-D.jpg]](http://www.mijnalbum.nl/Foto-AOIFKAUY-D.jpg)
![[Image: Foto-87UMP4RC-D.jpg]](http://www.mijnalbum.nl/Foto-87UMP4RC-D.jpg)
![[Image: Foto-GTWWXN4I-D.jpg]](http://www.mijnalbum.nl/Foto-GTWWXN4I-D.jpg)
![[Image: Foto-EUDPQK47-D.jpg]](http://www.mijnalbum.nl/Foto-EUDPQK47-D.jpg)
![[Image: Foto-ZQBDN68V-D.jpg]](http://www.mijnalbum.nl/Foto-ZQBDN68V-D.jpg)
![[Image: Foto-UECKNLJA-D.jpg]](http://www.mijnalbum.nl/Foto-UECKNLJA-D.jpg)
![[Image: Foto-3EX3ON7Q-D.jpg]](http://www.mijnalbum.nl/Foto-3EX3ON7Q-D.jpg)
![[Image: Foto-QUY4VTMT-D.jpg]](http://www.mijnalbum.nl/Foto-QUY4VTMT-D.jpg)
![[Image: Foto-6ZRS8SOH-D.jpg]](http://www.mijnalbum.nl/Foto-6ZRS8SOH-D.jpg)
![[Image: Foto-FDVSK8WA-D.jpg]](http://www.mijnalbum.nl/Foto-FDVSK8WA-D.jpg)
![[Image: Foto-L8DWUVIB-D.jpg]](http://www.mijnalbum.nl/Foto-L8DWUVIB-D.jpg)
![[Image: Foto-JRGRYKFW-D.jpg]](http://www.mijnalbum.nl/Foto-JRGRYKFW-D.jpg)