Cherry 5dr dt

Thread Rating:
  • 1 Vote(s) - 1 Average
  • 1
  • 2
  • 3
  • 4
  • 5
Cherry 5dr dt
#61
So I tried the 'ignore it and it'll go away' solution but the fairys didnt come and fit my engine so i had to resort to the 'its bank holiday and ive finally got a day off' solution.

I had been waiting for parts for awhile, that and fine weather to finish the top boost pipe.
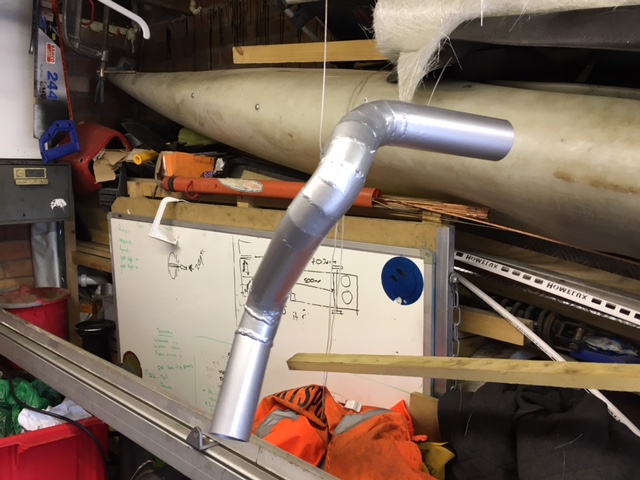


All put together the top pipe using norman constant tension clamps

I'd ordered some nipples for the boost guage take off but the bugger snapped before it was even down tight, so uncovered the lathe and made a new one from an old mig tip .
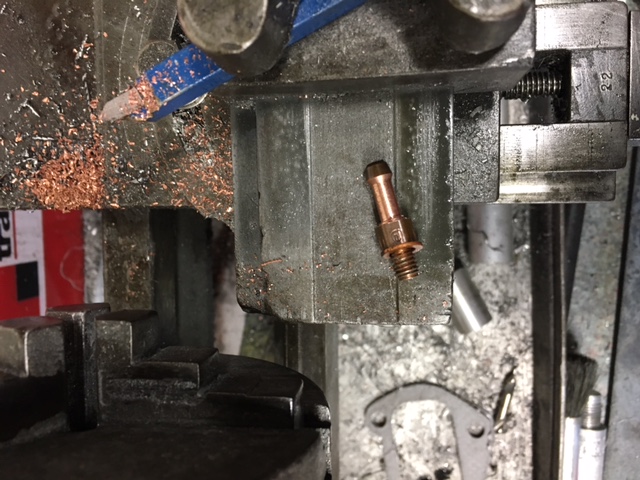
   

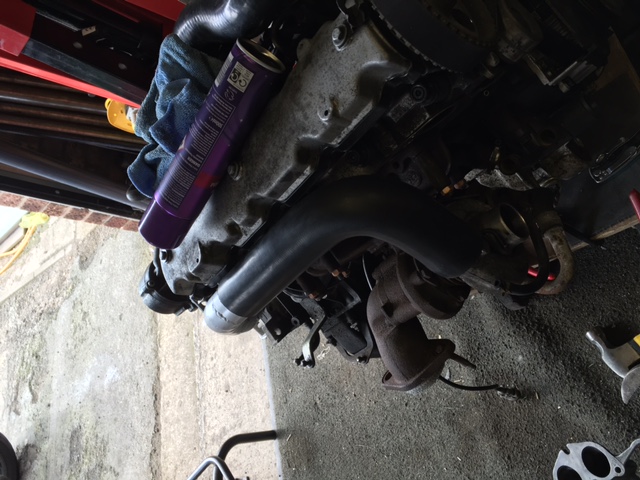
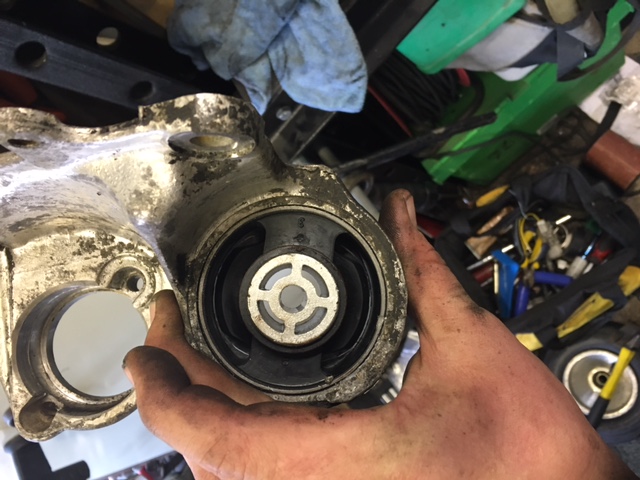
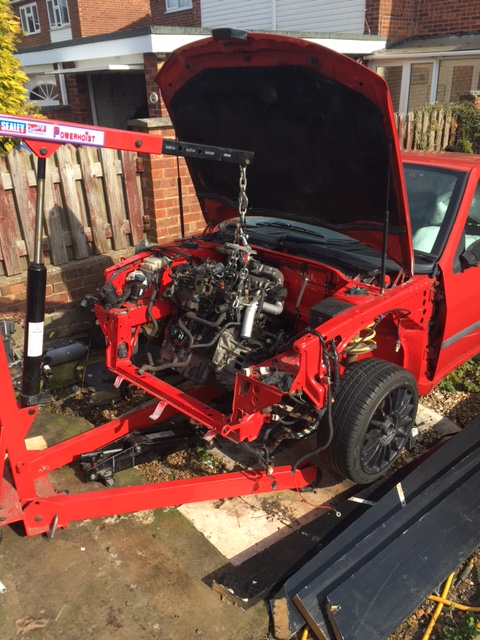
Swapped the rear mounts out and dropped the engine in the bay.
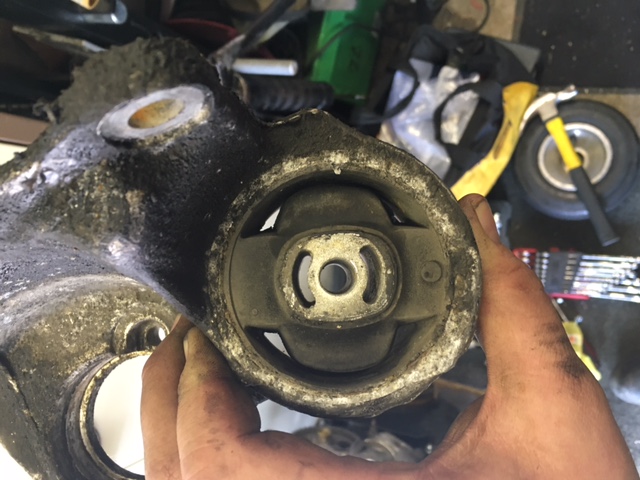


Managed to get all the loom and and rear coolant pipes plumbed before the rain stopped play.
I swiftly retreated the the garage to make a holder for the fuel filter i found in the garage,
Que a buggered conrod and many jokes about keeping a spare for the engine
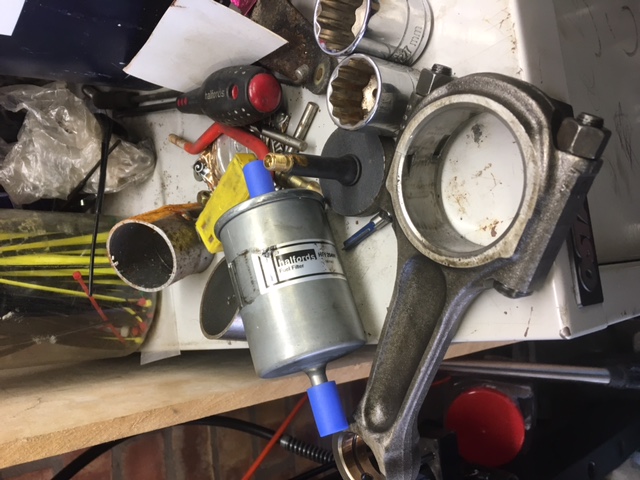
   

Ill update the rest once the paint dry's on the new mount
Reply
Thanks given by:
#62
Few quick shots of the fuel filter and mount before I hit the sack.
   
   
Reply
Thanks given by:
#63
Love the fuel filter holder haha Big Grin proper good idea that is haha
Reply
Thanks given by:
#64
So I've been trying foe the last few days to get my head around this update and Tbh I still havent really Confused A hell of alot has happened since the last update.

To cut a long story short mid 2016 everything started to get hectic and I stopped browsing forums and working on my cars.

March this year came and my Daily 306 was suffering badly, struggling to start/Down on power and the suspension was past its best, with its MOT looming in April my Dad gave me a much needed kick up the ar$e and dragged me to get on with the cherry DT.

A plan was made to get the Cherry DT on the road to replace the tired provance, but it still needed a lot of work to pass a MOT
It needed
-Rad fitting
-Fans
-Intercooler mounts
-Front intercooler pipe
-Lights
-Rear Axle
-Brake Bleed
-Mahoosive hole
-Exhaust
-Turbo Inlet

I took a week off work, dragged my parents over and we got cracking but to make it all a little tricky we decided to book its MOT for thursday 9am figuring I'd need friday for shakedown and adjustments.

We started Monday morning ny taking an inventory of parts, ordering what ever was missing and chasing broken promises by friends ( the bodywork one who was refurbing my wheels as payment for work to his car)I needed the imola's back as I trial fitted the Smr's I'd bought but found one royally fecked Censored


The other problems we had inc my used but good condition beam which was supposed to be lowered by 30mm was -120mm and the TB's wouldnt budge Doh 
This ment with the time restraints we'd have to remove the good beam and the 15" alloys from my other car and fit them to the Dt so she'd pass her test as 14" steels dont fit over 283mm brakes, we planned to make this wednesdays job so we knew everything else was fine before I had two unroadworthy cars.

We split the tasks up and my Mum and Dad took the mahoosive hole at the back whilst I took the intercooler mounts and top IC pipe build


I wish I had more time to spend on the IC pipe work as I didn't have time to bead them and now im paying for it

The fan shroud required much fettling and the stock fans where scrapped for slimmer nissan ones to gain clearance for the megane IC


Whilst we was working on the car my younger brother came over and installed a dash panel he'd been working on along with a boost guage and some switches for driving lights and other future mods


The battery was also reloacted to the boot using a motorsport bulkhead connector and some cable liberated from a BMW found in the local srappy whilst getting the fans Big Grin
Giving the old girl her face back required alot of trimming of the bumper using my fravorite angry grinder. From here pics get rather thin on the ground as we had a looming deadline and not a deal of light


Once all the other jobs had been completed we brought the province onto the driveway and robbed the beam and wheels for the Dt to wear for awhile, after giving her a good check over we pulled the Dt out onto the road for the first time since March 2014 and then did the usual checks before heading to the test station.
As per ecery car ive taken for a first test she decided that it wasnt going to run a smoothly as i wanted and i had to rush to the local motorfactors for another h7 and a washer pump and neither wanted to work (worked wednesday eve)


After all that I was rewarded with a nearly clean sheet, 2 advisorys
- bent wheel lip
-Stiff steering

The stiff steering was gone by the time he'd finished the test and the bent wheel lips been like that for 5 years and i really cant be bothered to get it straightened on those rims.

Theres still more to catch up on but I need to organise more pics and my thoughts as I'm sure I've missed loads out
Reply
Thanks given by:
#65
Looks good dude how hard was the battery relocation?
Check Out My Build Threads // Puglet Build 
Reply
Thanks given by:
#66
The relocation was pretty easy, I'll get you some pics of the instal and link the bulkhead connector I used if you'd like?
Reply
Thanks given by:
#67
That would be great i always wanted to gearbox mount my HDI but never looked at the actually material and such.
Check Out My Build Threads // Puglet Build 
Reply
Thanks given by:
#68
Ive got a few phots for you tommie, there not the best but it should give you a good idea.

For my battery relocation I used cable scavenged from a BMW down the scrappy for £5, this is by far the easiest and cheapest way to get hold of good quality cable the other items I used was:
-16 ton hydraulic crimper £23 off ebay
-Motorsport bulhead fitting
-M8 silentblock M/M
-Caravan battery box £12 from my local carvan dealer


I started by drilling for the bulkhead fitting, the location I used has tons of room behind the dash to fit the power cable and it runs down the N/S of the car lovely under the carpet
   

fitting the silentblock to the engine mount ment it had to come off to get a nut behind it, i coulve used the M6 holes but as i had it off for painting at the time it seemed rude not to weld a nut in the back
   

You could use the original alt and starter wiring but I used a thicker guage as I didnt want any starting issues, I also beefed up all the earths for the same reason.
Cable wise one BMW will donate enough todo the entire relocation Big Grin
 
In the boot for the earth I used one of the factory ones for the rear loom and a blind slug I made on the lathe and welded in when my dad welded the quater up for me.


The battery box is held down with rivnuts through the boot floor, but normal nut/bolts and washers will suffice I just used riv nuts as you never know if your gonna have an extra pair of hands if you need to remove it

If you need anymore pics or advise just holla, ive put links of items i used at the bottom of the post just to give you a few ideas 


https://www.ebay.co.uk/itm/2PCS-M8-Rubbe...Sw~FJZJS2o

https://www.merlinmotorsport.co.uk/p/lon...ptor-45700

https://www.ebay.co.uk/itm/16Ton-Hydraul...SwGJlZGxl8

So i left off at the car getting a MOT, theres still loads to catch up ( well feels like it )

I bought a replacement SMR to replace the butchered one and started a refurb on them
   

Then work happened as per usual and only one got done Rofl
Whilst i was working 6 days a week I made ebay my best friend and purchased:
-Colour coded mirrors
-Spare rear calipers
-Better condition window trims
-OE splitter
-OE spoiler
-Replacement drivers door in cherry red
-PH3 front and rear bumpers


Then work slowed a little so i got cracking, the first thing that had to change was the cancerous window trims as they depressed me everytime I walked up to the car (even more then the door that the horse made)
Mid change to show before and after
   

A quick session saw the mirrors changed, like with the trims a little change makes quite the difference
   

Then she got a damn good clean, 10k milage in 2 months takes its toll badly im afraid
   

That brings me up to around the begining of september, nothing really changed during that time other then a mini amp in the glove box as the radio had no where to live anymore.
Then one bored night at the unit Me and Alex fitted the splitter and spoiler, turned out the splitter was actually a ph3 one so a little trim was required


That'll do for them moment, ill have a dig through my phone for more pics and report back soon
Reply
Thanks given by:
#69
(26-10-2017, 08:54 PM)306Dan Wrote: Ive got a few phots for you tommie, there not the best but it should give you a good idea.

For my battery relocation I used cable scavenged from a BMW down the scrappy for £5, this is by far the easiest and cheapest way to get hold of good quality cable the other items I used was:
-16 ton hydraulic crimper £23 off ebay
-Motorsport bulhead fitting
-M8 silentblock M/M
-Caravan battery box £12 from my local carvan dealer


I started by drilling for the bulkhead fitting, the location I used has tons of room behind the dash to fit the power cable and it runs down the N/S of the car lovely under the carpet


fitting the silentblock to the engine mount ment it had to come off to get a nut behind it, i coulve used the M6 holes but as i had it off for painting at the time it seemed rude not to weld a nut in the back


You could use the original alt and starter wiring but I used a thicker guage as I didnt want any starting issues, I also beefed up all the earths for the same reason.
Cable wise one BMW will donate enough todo the entire relocation Big Grin
 
In the boot for the earth I used one of the factory ones for the rear loom and a blind slug I made on the lathe and welded in when my dad welded the quater up for me.


The battery box is held down with rivnuts through the boot floor, but normal nut/bolts and washers will suffice I just used riv nuts as you never know if your gonna have an extra pair of hands if you need to remove it

If you need anymore pics or advise just holla, ive put links of items i used at the bottom of the post just to give you a few ideas 


https://www.ebay.co.uk/itm/2PCS-M8-Rubbe...Sw~FJZJS2o

https://www.merlinmotorsport.co.uk/p/lon...ptor-45700

https://www.ebay.co.uk/itm/16Ton-Hydraul...SwGJlZGxl8

So i left off at the car getting a MOT, theres still loads to catch up ( well feels like it )

I bought a replacement SMR to replace the butchered one and started a refurb on them


Then work happened as per usual and only one got done Rofl
Whilst i was working 6 days a week I made ebay my best friend and purchased:
-Colour coded mirrors
-Spare rear calipers
-Better condition window trims
-OE splitter
-OE spoiler
-Replacement drivers door in cherry red
-PH3 front and rear bumpers


Then work slowed a little so i got cracking, the first thing that had to change was the cancerous window trims as they depressed me everytime I walked up to the car (even more then the door that the horse made)
Mid change to show before and after


A quick session saw the mirrors changed, like with the trims a little change makes quite the difference


Then she got a damn good clean, 10k milage in 2 months takes its toll badly im afraid


That brings me up to around the begining of september, nothing really changed during that time other then a mini amp in the glove box as the radio had no where to live anymore.
Then one bored night at the unit Me and Alex fitted the splitter and spoiler, turned out the splitter was actually a ph3 one so a little trim was required


That'll do for them moment, ill have a dig through my phone for more pics and report back soon


Thanks for that Dan i have a bmw but dont fancy ripping my battery wires out haha. Ill drop you a few messages if i have any more questions.
Check Out My Build Threads // Puglet Build 
Reply
Thanks given by:
#70
No probs tommie if you've any questions dont hesitate and ill try and answer the best i can.

I left off mid september with the updates and by that point I had two ticking cv's (guess they didnt appreciate the extra power after 20 years and 150k) Now what I shoud've done is order two new shaftec joints and refurbed the outer ends of my original peugeot shafts, but as time was short i got online and ordered two "new" shafts from JandRcvjoints.

Now before I have my mini rant I want you to know I dont usually slag anyone or a company off online but I received such a poor product and even worse customer service I feel compelled to worn folk about these guys so here it is.
Their shafts are so p**s poor that they failed before the car had got to the end of my driveway, I rang them on multiple occasions and even had frav (owns my local MOT station and a good friend of the family) and the best response we got after been kind, cautious and understanding was
" We as a multi million pound company dont take threats laying down, and what qualifications do YOU even posses to even think YOU have the knowledge and the skill to fit something as crutial as a driveshaft"

None of the people involved ever made any threats of anything but felt compelled after that email I recieved, we even went as far as to send the shafts to northern road to be inspected and recieved a report on them, when i collected them the engineer who looked at them said something along the lines of "Lad youve been had, these are as much use as a chocolate tea pot"

Annoyed wasnt the word but its a public forum so i cant use the other one Rofl
 
Anywho Rant over, lesson learned and so far my williness to share this with friends/colleges/etc has saved a few people quite a headache and i hope it carrys on doing so.
While all this was blowing out of proportion my Mum decided to buy two shaftec joints behind my back ( thank god, as i wasnt thinking straight at the time) so i refurbed the outer joints and refitted my original shafts 

Ignore the box, i just used them to store my old shafts when i fitted the "new" ones
   

To cheer myself up after this whateveryouwanttocallit I painted the pad carriers of the spare calipers ready to fit to my car once i aquire some mintex pads
   

This brings me nearly up to date, two weeks ago I made a run to my local scrappy as i got word of a xsara in and i had first dibs Big Grin

It yieled
4x 15" steels with 6mm tyres (albeit cheap ones, Three A i believe)
1x xsara beam with 0 additional camber
and then a chap brought an Fto in so i grabbed these before anyone else could
   
This leaves me with a problem, which seats to use as ive got the mr2 ones still?

On a last thought, what do you all think to painting the steels white? theyll only be winter wheels/spares so i dont have to run the SMR's thought all the rubbish weather
Reply
Thanks given by:
#71
ok for some reason all the pics are sideways Huh 
Is it just me that see's them like that or does anyone else?
Reply
Thanks given by:
#72
Hi Dan.  That's really bad luck about the driveshafts.  I got some from GSF a while back after getting sent a discount code.  They've been on for about a year and seem fine, for anyone who's interested.

Which brings me on to a question?  The outer CV boots had failed on the old driveshafts and I tried using stretch boots to replace them.  The stretch boots lasted just a few months.  I tried to get the old CV joints off in order to fit some proper boots but failed.  I had watched some Youtube vids saying to give them a sharp whack but was worried that I'd damage them if I really went to town on them.  They ended up getting thrown in the shed and have laid there since.

Anyway, any advice on how it's done would be great as then I can refub them, ready to go if needs be.

Cherry dt scrubs up well btw!

Ta very much Smile
Reply
Thanks given by:
#73
Cheers for the compliments about the old girl, she does look lovely once I've had chance to clean her.

With the CV's on these shafts once you remove the joint thats it you might aswell scrap it as you have to remove them with an almighty smack with a hammer, one of mine broke the other survived fine (althought they'd worn out anyway) the vids about carefully cutting them do work but tbh your better off wrapping a rag round the shaft putting it in a vice and hitting the back of the joint with a good solid hit.

I personally after the crap I had with J&R would only use shaftec joints as iirc their OEM for peugeot and fairly priced too at £50 for the pair, the fittings that come with the shaftec kits are all nicely made, plenty of grease packets and the boots seem to be a very high quality ( with this last sentance shaftec might aswell pay me commision Rofl )
The shafts are quite easy to refurb if im honest as long as youve a vice bollted down to something as youll need it for reassembly too

When pitting the new joints on i tried a few different approches to compressing the ring, i tried shaftecs trick of a jubilee but they all failed in the end i mounted the shaft verticle in the vice, applied a little pressure to the top of the joint and eased the ring in with a small screwdriver working my way round, the entire refurb took maybe 40mins and 25 of that was re watching youfail vids for hints and tricks.

If you need anymore help with the refurb or a vid etc ill gladly go beat the joints off the J&R ones Angel
Reply
Thanks given by:
#74
Hi Dan.  Cheers for the advice and the offer of doing a teccy video.  From the sounds of it I just need to strike the CV joints harder to get them off the shaft!  I'll give it a go sometime and see if they end up wrecked and if they do I'll take your advice and get some Shaftec ones!
Reply
Thanks given by:
#75
So then I've failed pretty epically to keep this thread updated Doh 

I'll start off with december as tbh i cant remember what happened late last year, I'll stop mumbling now and get on with it.

Most of the festive period was spent working on the Midget with my Dad and installing this for the two of us.
   
We've wanted a ramp in the unit ever since we started renting the place, as I bet most of you agree that working on your back in the cold and damp sucks majorly.

The downside of having a ramp is you find all sorts of excuses to use it including buying more projects, more projects means you have to tidy the unit up some more and that burns many hours to achieve nothing Sad

The only thing that happened pug wise was make this as the lower center console looked a little plain with the three red switches further up.
   

Come March and I think the old girl decided that 31k and 12months trouble free driving was more then enpugh for a 20 year old car.

First up was the MOT which bar confusing Frav with how to start her I recieved a very expensive piece of copier paper, what ever happened to proper certs? am I the only one who feels dissapointed at a £50 piece of copier paper? 

However things where not all good this day, Pulling out of the village after the test she decided to point me at a ditch under hard accelertion and repeated this again once id straightened her out again Dodgy 
So rather then drive the 10miles back to mine I span her round and decided to steal Mum and Dads drive and tools, its not really a hard decision as Mum does make a cracking brew and lemon cake Inlove  Once the snacks and brew was devoured I jacked her up to find two very dead P bushes, how this happened is beyond both me and Frav as she was fine going to the test and Frav wouldve never passed her like this, the only thing we could think of at the time was he'd just had a brand new stand alone test lane installed which may of possibly helped accelerate the failure???

Anyways two genuine Pug partner P bushes where installed and a very rough alignment was done until I get the rear alloys fitted again.


With the front handling well again i began to notice all was not well with the beam, no play was present but a smidge of camber was showing and the arse felt floaty in hard RH corners Censored 

This brings us up to the end of March and I'll end it here for now as your all probably bored with my rambling by now Rofl
Reply
Thanks given by:


Forum Jump:


Users browsing this thread: 1 Guest(s)